Mac环境搭建STF

前言

之前在Ubuntu上面搭建了STF:Ubuntu+Docker+STF环境搭建 最近公司需要将STF部署在Mac环境,本来以为和在Ubuntu上面一样使用Docker部署几行命令就可以轻松解决,结果发现Mac Docker环境不支持Android USB,即使环境起来了也不能识别插入的安卓手机,因为底层的xhyve不支持它。关于问题细节请参考这个issue

环境搭建

依赖包安装

在终端使用输入命令安装所需的依赖:

1
brew install  graphicsmagick zeromq protobuf yasm pkg-config

若提示找不到brew,则需要先安装brew,终端命令:

1
/usr/bin/ruby -e "$(curl -fsSL https://raw.githubusercontent.com/Homebrew/install/master/install)"

Node.js安装

Node.js版本强烈建议选择8.X 版本,如果是安装了最新10.X及以上版本后续安装stf过程中可能会出现报错,在 https://npm.taobao.org/mirrors/node/ 下载8.X的版本,Mac系统需要下载后缀名为.pkg的安装包

我这里安装的版本信息如下:

1
2
3
4
5
stfs-Mac-mini:~ stf$ node -v
v8.16.0
stfs-Mac-mini:~ stf$ npm -v
6.4.1

由于网络限制,为了保障后续安装顺利,这里我们建议增加 npm淘宝镜像。

1
2
npm install -g cnpm --registry=https://registry.npm.taobao.org

adb安装

使用brew安装,命令如下:

1
brew cask install android-platform-tools

安装完成后,连上Android 设备(开启usb-debug)输入命令adb --version查看是否安装成功。

1
2
3
4
stfs-Mac-mini:~ stf$ adb --version
Android Debug Bridge version 1.0.41
Version 29.0.1-5644136
Installed as /usr/local/bin/adb

rethinkdb安装

使用brew安装,命令如下:

1
brew install rethinkdb

安装完成后输入如下命令进行校验

1
2
3
stfs-Mac-mini:~ stf$ rethinkdb -v
rethinkdb 2.3.6 (CLANG 10.0.0 (clang-1000.10.43.1))

stf安装

这里我们使用上面安装的cnpm来安装

1
cnpm install -g stf

安装完成后使用命令stf doctor检查相关依赖是否安装正常。

1
2
3
4
5
6
7
8
9
10
11
stfs-Mac-mini:~ stf$ stf doctor
2019-08-01T05:17:19.556Z INF/cli:doctor 58578 [*] OS Arch: x64
2019-08-01T05:17:19.558Z INF/cli:doctor 58578 [*] OS Platform: darwin
2019-08-01T05:17:19.558Z INF/cli:doctor 58578 [*] OS Platform: 18.0.0
2019-08-01T05:17:19.558Z INF/cli:doctor 58578 [*] Using Node 8.16.0
2019-08-01T05:17:19.572Z INF/cli:doctor 58578 [*] Using ZeroMQ 4.3.2
2019-08-01T05:17:19.581Z INF/cli:doctor 58578 [*] Using GraphicsMagick 1.3.33
2019-08-01T05:17:19.582Z INF/cli:doctor 58578 [*] Using ADB 1.0.41
2019-08-01T05:17:19.587Z INF/cli:doctor 58578 [*] Using RethinkDB 2.3.6
2019-08-01T05:17:19.589Z INF/cli:doctor 58578 [*] Using ProtoBuf 3.7.1

如果安装过程中出现如下错误,说明Node版本不兼容。

1
2
3
4
5
6
7
8
9
10
11
12
13
14
15
16
17
18
19
20
21
22
make: *** [Release/obj.target/bufferutil/src/bufferutil.o] Error 1
gyp ERR! build error
gyp ERR! stack Error: `make` failed with exit code: 2
gyp ERR! stack at ChildProcess.onExit (/usr/local/lib/node_modules/cnpm/node_modules/node-gyp/lib/build.js:262:23)
gyp ERR! stack at ChildProcess.emit (events.js:198:13)
gyp ERR! stack at Process.ChildProcess._handle.onexit (internal/child_process.js:248:12)
gyp ERR! System Darwin 18.0.0
gyp ERR! command "/usr/local/bin/node" "/usr/local/lib/node_modules/cnpm/node_modules/npminstall/node-gyp-bin/node-gyp.js" "rebuild"
gyp ERR! cwd /usr/local/lib/node_modules/stf/node_modules/_bufferutil@1.3.0@bufferutil
gyp ERR! node -v v10.16.1
gyp ERR! node-gyp -v v3.8.0
gyp ERR! not ok
[npminstall:runscript:error] bufferutil@^1.2.1 has binding.gyp file, run "node-gyp rebuild" error: RunScriptError: Run "sh -c node-gyp rebuild" error, exit code 1
Install fail! RunScriptError: Run "sh -c node-gyp rebuild" error, exit code 1
RunScriptError: Run "sh -c node-gyp rebuild" error, exit code 1
at ChildProcess.proc.on.code (/usr/local/lib/node_modules/cnpm/node_modules/runscript/index.js:96:21)
at ChildProcess.emit (events.js:198:13)
at maybeClose (internal/child_process.js:982:16)
at Process.ChildProcess._handle.onexit (internal/child_process.js:259:5)
npminstall version: 3.22.1
npminstall args: /usr/local/bin/node /usr/local/lib/node_modules/cnpm/node_modules/npminstall/bin/install.js --fix-bug-versions --china --userconfig=/Users/stf/.cnpmrc --disturl=https://npm.taobao.org/mirrors/node --registry=https://r.npm.taobao.org -g stf --unsafe-perm

解决方案:使用如下命令卸载Node,然后安装8.X版本的Node

1
sudo rm -rf /usr/local/{bin/{node,npm},lib/node_modules/npm,lib/node,share/man/*/node.*}

然后在 https://npm.taobao.org/mirrors/node/ 下载8.X的版本,Mac系统需要下载后缀名为.pkg的安装包

启动服务

启动rethinkdb

stf使用的是RethinkDB数据库,所以在启动stf前需要先启动RethinkDB,启动命令如下:

1
rethinkdb --bind all --cache-size 8192 --http-port 8090
  • --cache-size指定缓存大小
  • --http-port 指定端口

启动stf

1
stf local --public-ip <本机的IP地址>

最后输入http://localhost:7100或者 http://<ip地址>:7100即可访问stf地址,界面如下:

image

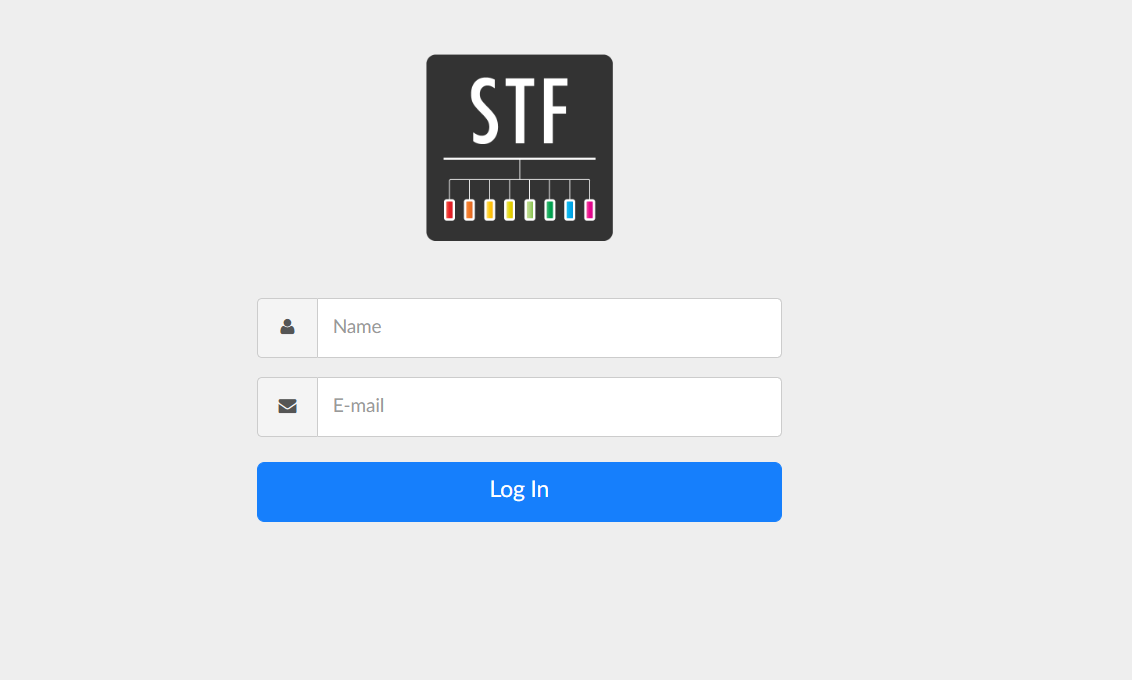
输入用户名和邮箱即可登录,用户名和邮箱可以随便填写。

配置LDAP

为何要使用LDAP?

前面我们可以看到STF登录页面默认是只要输入NameE-mail就可以直接登录,没有对账号进行权限控制。所以只要知道了sft服务器地址就可以直接登录,如果我们想在上面加上账户权限限制,那么该怎么办,这里我们可以使用使用LDAP模式登录。

首先关于什么是LDAP可以参考之前我写的一篇文章:Python实现LDAP认证

LDAP服务器登录一般需要如下参数:

  • LDAP SERVER URI (e.g: ldap://ladp服务器地址或域名:389)
  • LDAP BIND DN (连接director server需要用到的认证用户名,一般还需要密码)
  • LDAP BIND DN PWD(认证用户的密码)
  • LDAP BASE DN (服务器目录节点,用于查询用户,格式一般是DC=testerhome, DC=com)

stf auth-ldap

我们可以使用stf auth-ldap -h命令来看看ldap模块里面有哪些必备的option

1
2
3
4
5
6
7
8
9
10
11
12
13
14
15
16
17
18
19
20
21
22
stf auth-ldap -h

Usage: auth-ldap [options]

start LDAP auth client

Options:

-h, --help output usage information
-p, --port <port> port (or $PORT)
-s, --secret <secret> secret (or $SECRET)
-i, --ssid <ssid> session SSID (or $SSID)
-a, --app-url <url> URL to app
-u, --ldap-url <url> LDAP server URL (or $LDAP_URL)
-t, --ldap-timeout <timeout> LDAP timeout (or $LDAP_TIMEOUT)
--ldap-bind-dn <dn> LDAP bind DN (or $LDAP_BIND_DN)
--ldap-bind-credentials <credentials> LDAP bind credentials (or $LDAP_BIND_CREDENTIALS)
--ldap-search-dn <dn> LDAP search DN (or $LDAP_SEARCH_DN)
--ldap-search-scope <scope> LDAP search scope (or $LDAP_SEARCH_SCOPE)
--ldap-search-class <class> LDAP search objectClass (or $LDAP_SEARCH_CLASS)
--ldap-search-field <name> LDAP search field (or $LDAP_SEARCH_FIELD)

通过stf auth-ldap -h命令我们大致可以看到stfldap模式启动参数多得让我们眼花缭乱,但实际上我们只会用到其中几个,也就是前面需要大家准备的几个。

ldap参数对照

stf里需要启用ldap模式登录的话,必须要有bind dncredentialsobjectClassfield、search dn这么几样东西。但是这几样东西好像跟我们一开始去取的不太一样啊?其实一样的,这里我们来列一下对照的关系:

1
2
3
4
-u, -ldap-url : LDAP SERVER URI
--ldap-bind-dn : LDAP BIND DN
--ldap-bind-credentials: LDAP BIND DN_PWD
--ldap-search-dn : LDAP BASE DN

但是,好像还有个参数我们一开始没准备到:objectClassfield
这个是用于我们设置登录LDAP服务的时候的条件筛选,比如说,DS目录中,包含了员工的用户名、邮箱,那么你是可以通过field这个参数来配置是使用用户名还是使用邮箱来进行验证的。也就是说,你可以通过这个参数,来限制使用STF的用户只能使用邮箱来登录。

ldap启动命令

1
stf local --public-ip='本机IP' --auth-type ldap --auth-options '["--ldap-url","$LDAP SERVER URI", "--ldap-bind-dn","$LDAP BIND DN","--ldap-search-dn","$LDAP BASE DN", "--ldap-bind-credentials","$LDAP BIND DN PWD", "--ldap-search-class","user", "--ldap-search-field", "mail"]'

参数说明:

  • –auth-type ldap,指定auth的模式为ldap
  • –auth-option, 配置ldap启动的参数
  • –ldap-search-class=’user’,筛选目录下的所有用户
  • –ldap-search-field=’mail’,使用mail的方式来获取需要授权的用户

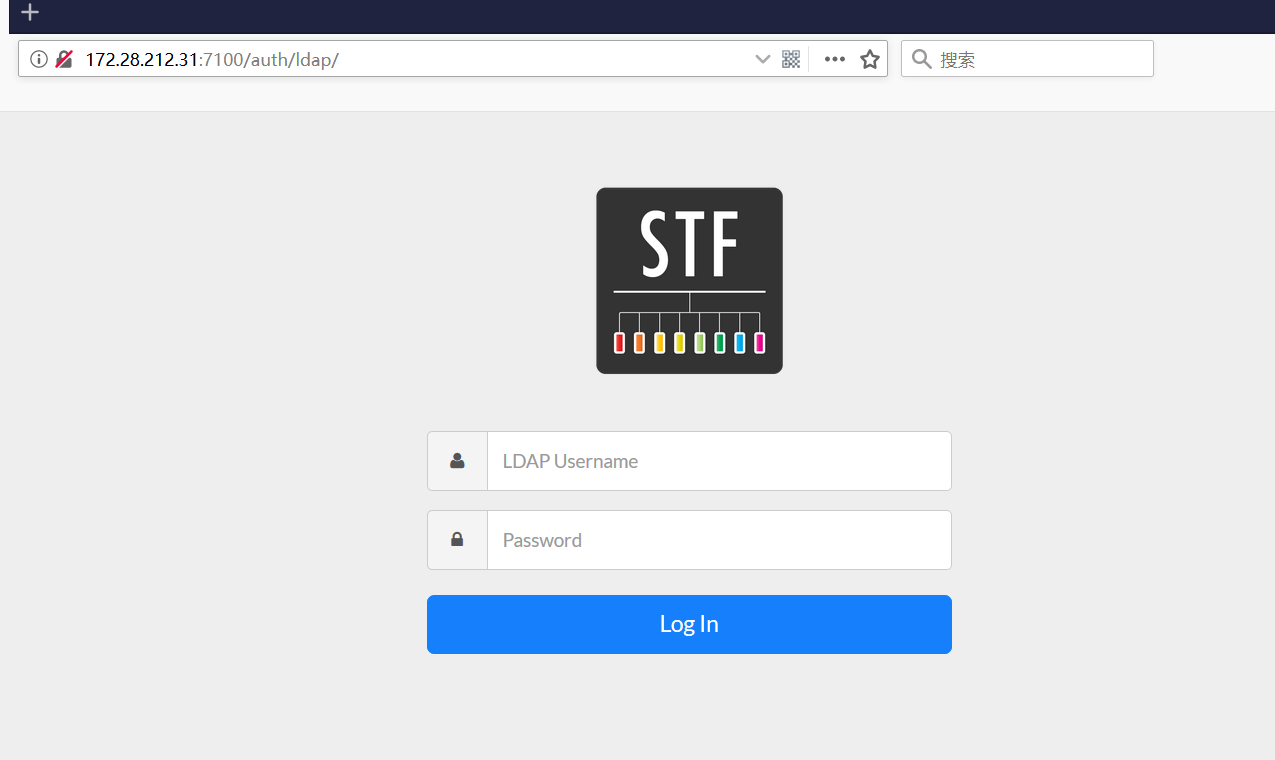
启动之后登录界面如下,此时需要输入分配的ldap账户和密码才能登录。同时登录地址也变为http://IP:7100/auth/ldap/

image

参考资料