什么是Mock
Mock在中文的含义就是模拟的意思,mock测试就是在测试过程中,对于某些不容易构造或者不容易获取的对象,用一个虚拟的对象来创建以便测试的测试方法。
简单来说,就是通过某种技术手段模拟测试对象的行为,返回预先设计的结果。这里的关键词是预先设计,也就是说对于任意被测试的对象,可以根据具体测试场景的需要,返回特定的结果。比如要测试支付,但是你不想真实支付,那么可以Mock来模拟支付,返回支付的结果。
Mock作用
首先,Mock可以用来解除测试对象对外部服务的依赖(比如数据库,第三方接口等),使得测试用例可以独立运行。
提前创建测试,TDD(测试驱动开发)。如果你创建了一个Mock那么你就可以在接口开发完成之前写接口测试脚本了,当接口开发完成时再替换为真实的接口进行测试即可。
替换外部服务调用,提升测试用例的运行速度。任何外部服务调用至少是跨进程级别的消耗,甚至是跨系统、跨网络的消耗,而Mock可以把消耗降低到进程内。
Json Server简介
json-server是一款小巧的Mock工具,它可以不写一行代码在30秒内创建一套Restful风格的 api,适合3人及以下的前端团队做迅速mock后台逻辑,也可以在接口测试中使用。相比较Django,flask来实现Mock要方便很多。
Json Server下载安装
环境依赖
安装
1
| cnpm install -g json-server
|
校验
安装完成后输入如下命令进行校验:
安装正确会提示如下内容:
1
2
3
4
5
6
7
8
9
10
11
12
13
14
15
16
17
18
19
20
21
22
23
24
25
26
27
28
29
| C:\Users\Shuqing>json-server -h
index.js [options] <source>
Options:
--config, -c Path to config file [default: "json-server.json"]
--port, -p Set port [default: 3000]
--host, -H Set host [default: "localhost"]
--watch, -w Watch file(s) [boolean]
--routes, -r Path to routes file
--middlewares, -m Paths to middleware files [array]
--static, -s Set static files directory
--read-only, --ro Allow only GET requests [boolean]
--no-cors, --nc Disable Cross-Origin Resource Sharing [boolean]
--no-gzip, --ng Disable GZIP Content-Encoding [boolean]
--snapshots, -S Set snapshots directory [default: "."]
--delay, -d Add delay to responses (ms)
--id, -i Set database id property (e.g. _id) [default: "id"]
--foreignKeySuffix, --fks Set foreign key suffix (e.g. _id as in post_id)
[default: "Id"]
--quiet, -q Suppress log messages from output [boolean]
--help, -h Show help [boolean]
--version, -v Show version number [boolean]
Examples:
index.js db.json
index.js file.js
index.js http://example.com/db.json
https://github.com/typicode/json-server
|
入门使用
创建data文件
首先创建一个json文件:db.json 内容如下:
1
2
3
4
5
6
7
8
9
| {
"posts": [
{ "id": 1, "title": "json-server", "author": "typicode" }
],
"comments": [
{ "id": 1, "body": "some comment", "postId": 1 }
],
"profile": { "name": "typicode" }
}
|
启动服务
1
| C:\Users\Shuqing>json-server --watch D:\api_test\json_action\db.json
|
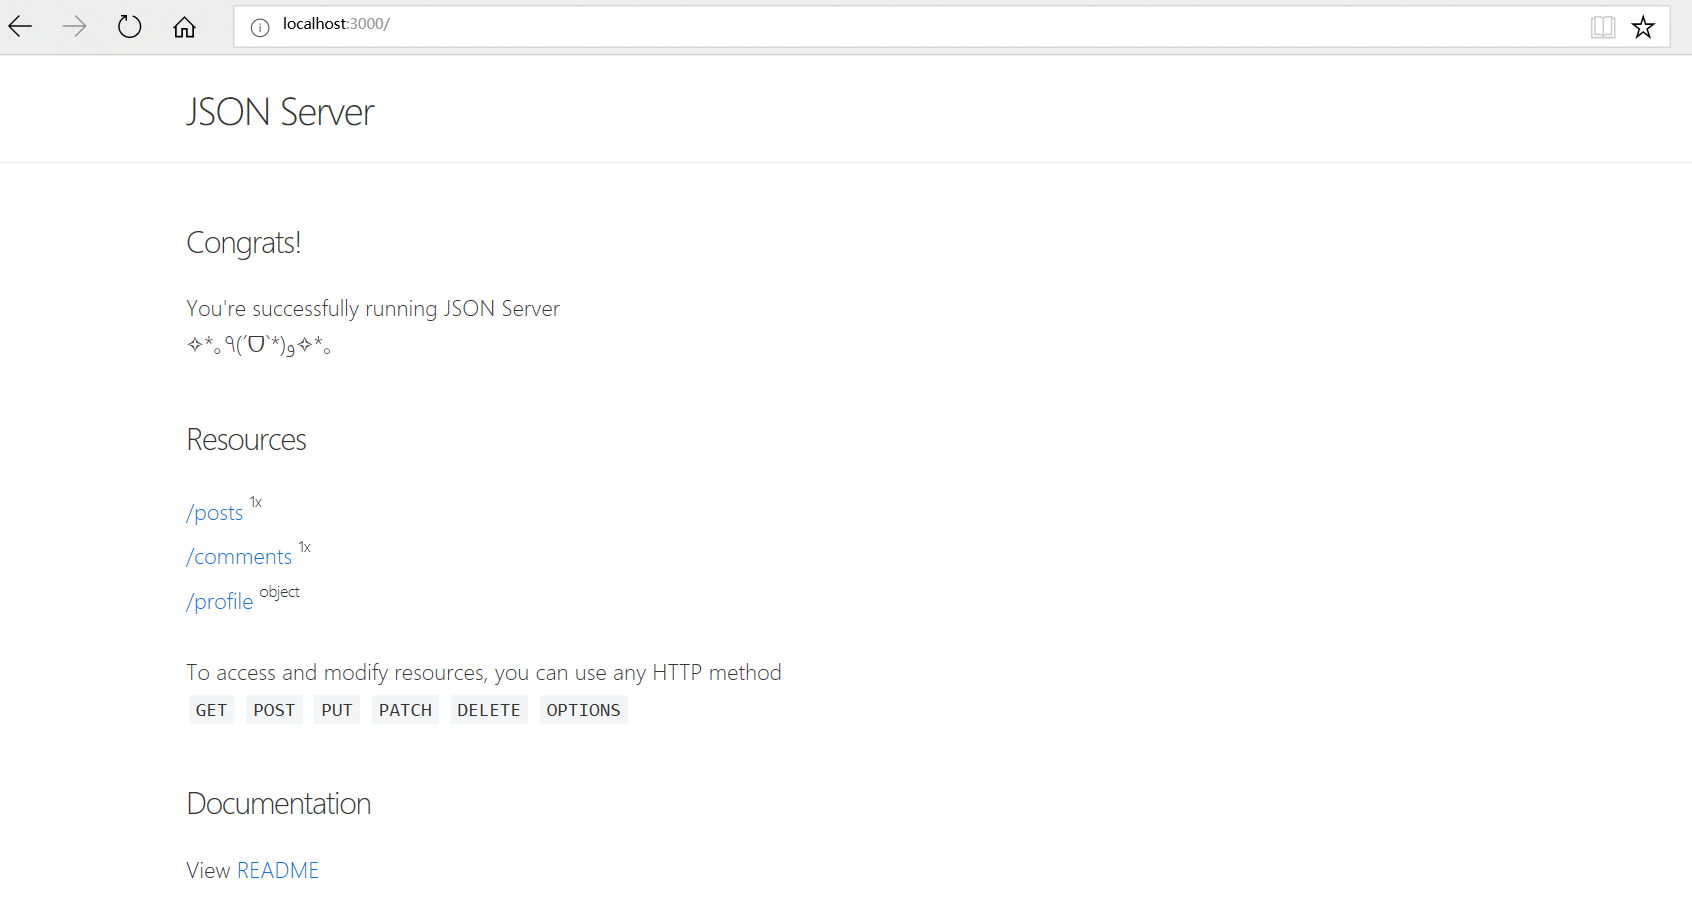
启动成功后可以看到如下提示:
1
2
3
4
5
6
7
8
9
10
11
12
13
14
15
16
17
|
\{^_^}/ hi!

Loading D:\api_test\json_action\db.json
Done

Resources
http://localhost:3000/posts
http://localhost:3000/comments
http://localhost:3000/profile

Home
http://localhost:3000

Type s + enter at any time to create a snapshot of the database
Watching...
|
接口测试
在浏览器输入 http://localhost:3000可以进入到主页。
查询
输入http://localhost:3000/posts 可以查看到对应的返回值:
1
2
3
4
5
6
7
| [
{
"id": 1,
"title": "json-server",
"author": "typicode"
}
]
|
输入http://localhost:3000/posts/1可以查看到如下返回值:
1
2
3
4
5
| {
"id": 1,
"title": "json-server",
"author": "typicode"
}
|
增加
使用POST请求可以增加数据,例如我们在Postman中进行如下配置
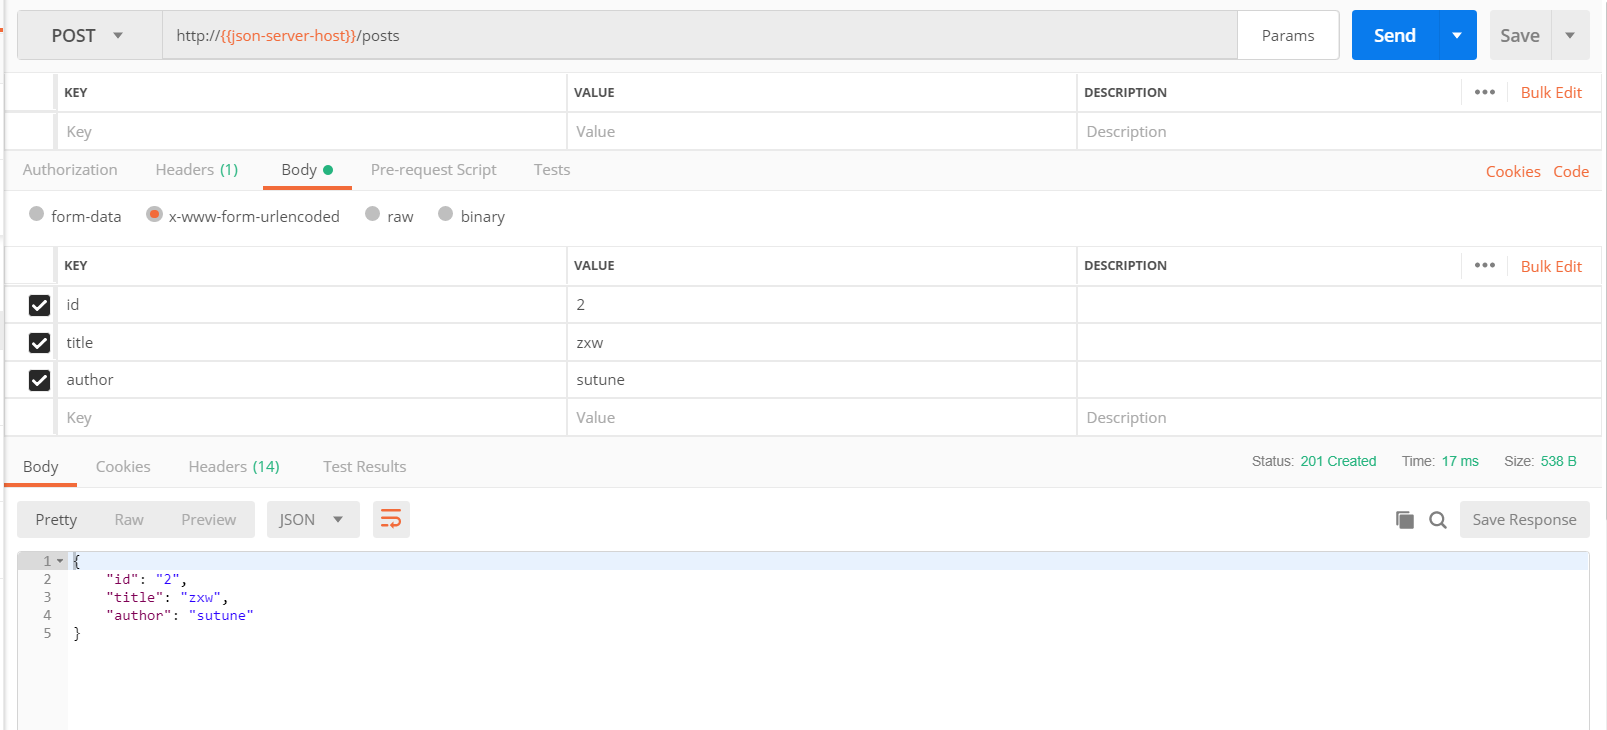
可以看到成功插入了数据。
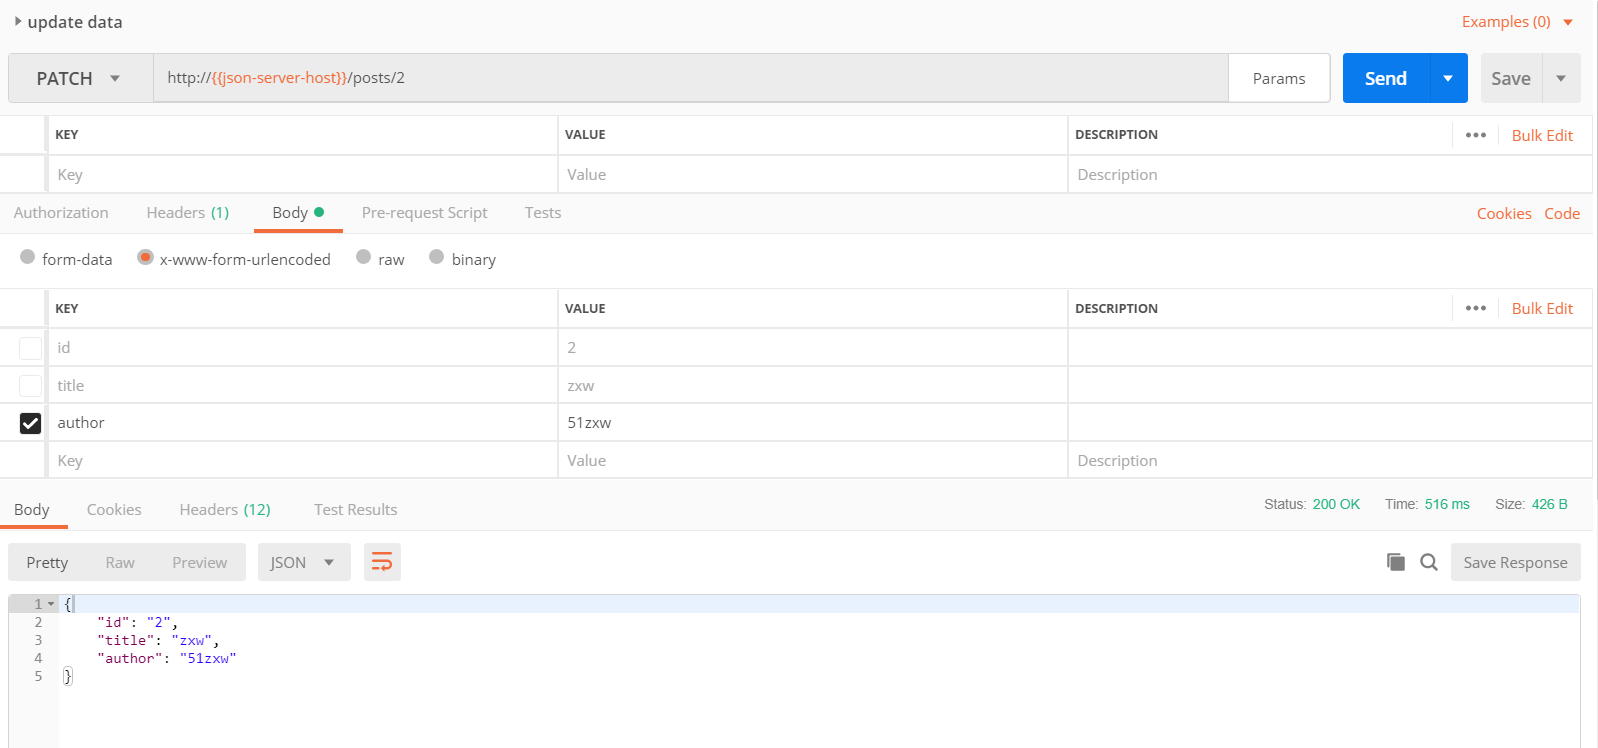
修改
使用PATCH或者PUT可以对数据更新,例如如下配置,即可修改author数据。
删除
使用DELETE可以删除数据,例如 请求http://{{json-server-host}}/posts/3,则会删除id=3的数据
路由生成
根据上面的data文件,默认情况下json-server会生成两类路由:
复数路由
1
2
3
4
5
6
| GET /posts
GET /posts/1
POST /posts
PUT /posts/1
PATCH /posts/1
DELETE /posts/1
|
单数路由
1
2
3
4
| GET /profile
POST /profile
PUT /profile
PATCH /profile
|
接口调试
首先创建db.json数据内容如下:
1
2
3
4
5
6
7
8
9
10
11
12
13
14
15
16
17
18
19
20
21
22
23
24
25
26
27
28
29
30
31
32
33
34
35
36
37
38
39
40
41
42
43
44
| {
"posts": [
{
  "id": 1,
  "title": "json-server",
  "author": "typicode"
},
{
"id": 2,
"title": "zxw",
"author": "sutune"
},
{
"id": 3,
"title": "zxw666",
"author": {"name":"jack"}
},
{
"id": 4,
"title": "zxw888",
"author": "Bob"
}
],
"comments": [
{
"id": 1,
"body": "some comment",
"postId": 1
},
{
"id": 2,
"body": "hello 51zxw",
"postId": 2
},
{
"id": 3,
"body": "hello zxw2018",
"postId": 3
}
],
"profile": {
"name": "typicode"
}
}
|
过滤
使用查询字符串参数(Query String Parameters)可以查询对应的数据
1
2
3
| GET /posts?id=1&id=2
GET /posts?title=zxw
|
指定过滤字段,使用.号可以查询更深层次属性
1
2
| GET /posts?author.name=jack
|
详见视频操作演示
分页
分页也是常用功能,使用_page指定第几页,_limit指定返回的数据条数。默认是一页显示10条数据。
1
2
3
| GET /posts?_page=1
GET /posts?_page=1&_limit=2
|
排序
_sort 表示排序字段,_order 表示具体的排序方式,默认是升序:asc降序为:desc。
1
2
3
| GET /posts?_sort=id&_order=asc #升序
GET /posts?_sort=id&_order=desc #降序
|
多字段组合排序
1
| GET /posts?_sort=para1,para2&_order=desc,asc
|
切片
切片与字符串数组切片类似,可以返回指定范围长度的数据内容,起始下标为0
_start指定纪录起始点,包含起点_end指定终点,不包含终点_limit指定返回的数量
1
2
3
| GET /posts?_start=0&_end=3
GET /comments?_start=0&_end=2
GET /posts?_start=0&_limit=2
|
操作
_gte: 大于_lte: 小于_ne: 不等于_like: 有点像sql的like,支持正则表达式
1
2
3
| GET /posts?id_gte=2&id_lte=3
GET /posts?id_ne=3
GET /posts?title_like=zxw
|
全局搜索
使用q参数,比如
查看db
参考资料