应用背景 在app应用日常使用过程中,会经常用到在屏幕滑动操作。如刷朋友圈上下滑操作、浏览图片左右滑动操作等。在自动化脚本该如何实现这些操作呢?
在Appium中模拟用户滑动操作需要使用swipe方法,该方法定义如下:
1
2
3
4
5
6
7
8
9
10
11
12
def swipe (self, start_x, start_y, end_x, end_y, duration=None ): """Swipe from one point to another point, for an optional duration. :Args: - start_x - x-coordinate at which to start - start_y - y-coordinate at which to start - end_x - x-coordinate at which to stop - end_y - y-coordinate at which to stop - duration - (optional) time to take the swipe, in ms. :Usage: driver.swipe(100, 100, 100, 400)
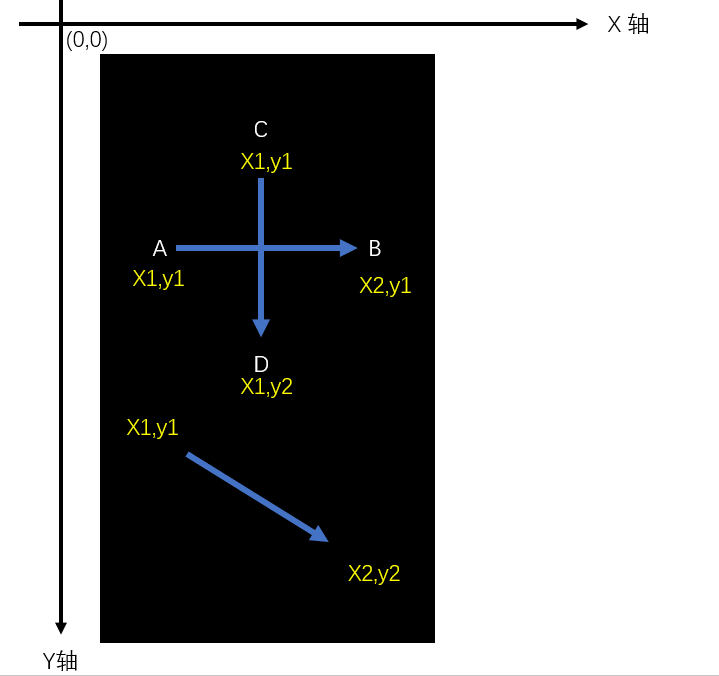
滑动解析 滑动主要分为:
水平滑动
垂直滑动
任意方向滑动
滑动轨迹图如下:
实践应用 测试场景
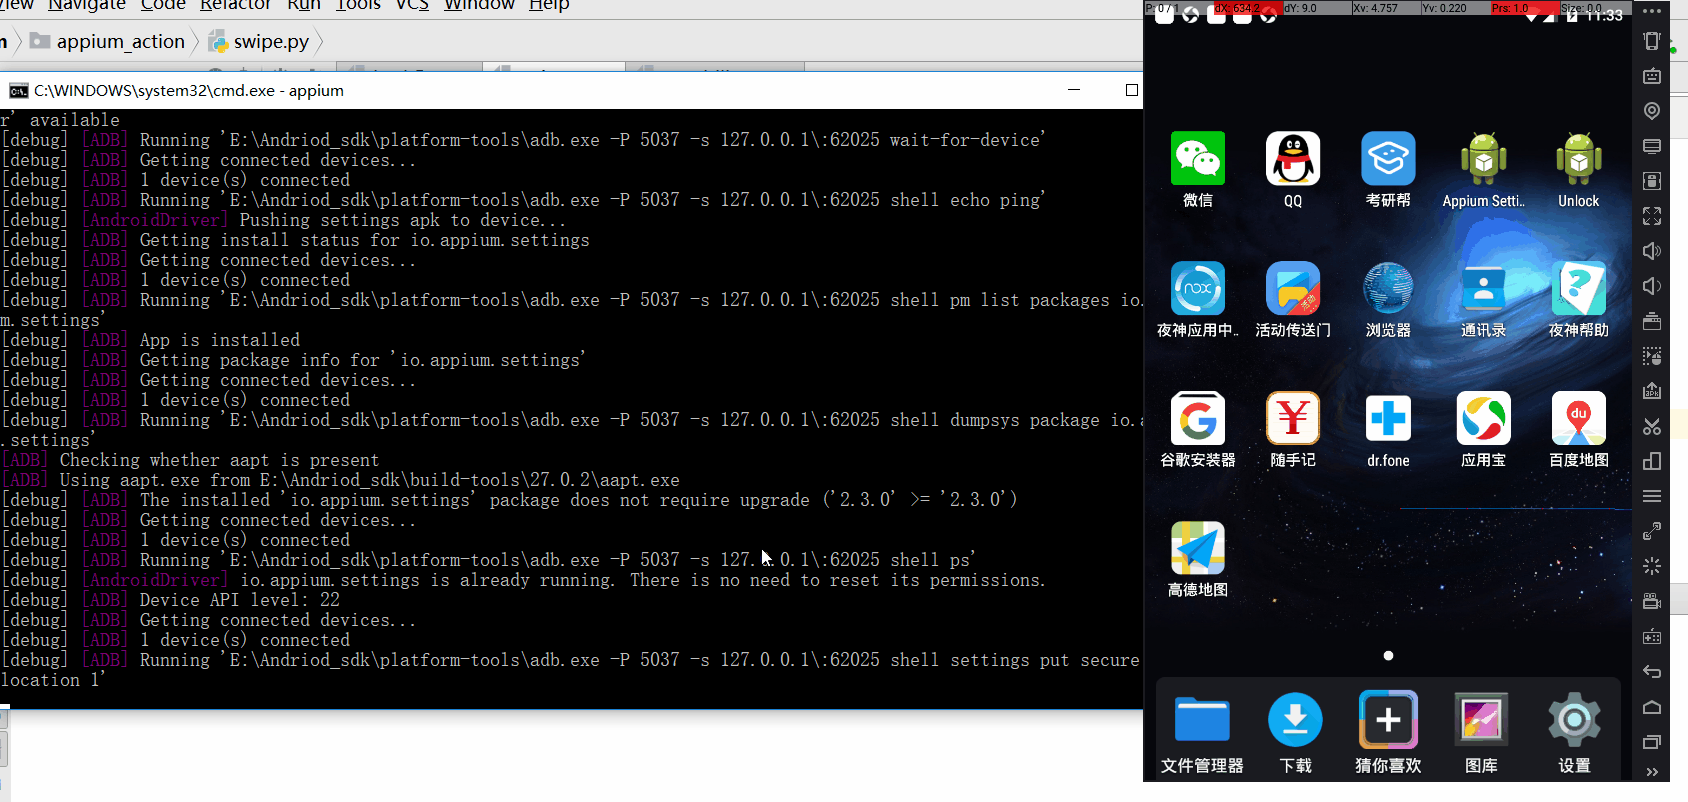
安装启动考研帮,手动向水平左滑动首页引导页面。
点击“立即体验”进入登录页面。
代码实现 swipe.py
1
2
3
4
5
6
7
8
9
10
11
12
13
14
15
16
17
18
19
20
21
22
23
24
25
26
27
28
29
from time import sleepfrom find_element.capability import driverdef get_size (): x=driver.get_window_size()['width' ] y=driver.get_window_size()['height' ] return x,y l=get_size() print (l)def swipeLeft (): l=get_size() x1=int (l[0 ]*0.9 ) y1=int (l[1 ]*0.5 ) x2=int (l[0 ]*0.1 ) driver.swipe(x1,y1,x2,y1,1000 ) if __name__ == '__main__' : for i in range (2 ): swipeLeft() sleep(0.5 ) driver.find_element_by_id('com.tal.kaoyan:id/activity_splash_guidfinish' ).click()
效果演示
其他滑动 把垂直上下滑动以及向右滑动的也封装并实践。
def swipeUp()
def swipeDown()
def swipeRight()
代码实现 1 2 3 4 5 6 7 8 9 10 11 12 13 14 15 16 17 18 19 20 21 def swipeUp (): l = get_size() x1 = int (l[0 ] * 0.5 ) y1 = int (l[1 ] * 0.95 ) y2 = int (l[1 ] * 0.35 ) driver.swipe(x1, y1, x1, y2, 1000 ) def swipeDown (): l=get_size() x1 = int (l[0 ] * 0.5 ) y1 = int (l[1 ] * 0.35 ) y2 = int (l[1 ] * 0.85 ) driver.swipe(x1, y1, x1, y2, 1000 ) def swipeRight (): l=get_size() y1 = int (l[1 ] * 0.5 ) x1 = int (l[0 ] * 0.25 ) x2 = int (l[0 ] * 0.95 ) driver.swipe(x1, y1, x2, y1, 1000 )
连续滑动 滑动操作一般是两点之间的滑动,而实际使用过程中用户可能要进行一些多点连续滑动操作。如九宫格滑动操作,连续拖动图片移动等场景。那么在Appium中该如何模拟这类操作呢?
TouchAction Touch Action包含一些列操作,比如按压、长按、点击、移动、暂停。由这些不同操作可以组成一套动作。使用TochAction需要先导入对应的模块
1 from appium.webdriver.common.touch_action import TouchAction
按压 方法:press()
1 2 3 press(self, el=None , x=None , y=None ) TouchAction(driver).press(x=0 ,y=308 )
长按 方法:longPress()
1 long_press(self, el=None , x=None , y=None , duration=1000 )
点击 方法:tap()
1 tap(self, element=None , x=None , y=None , count=1 )
移动 方法:move_to()
1 move_to(self, el=None , x=None , y=None )
注意:
移动到目标位置有时是算绝对坐标点,有时是基于前面一个坐标点的偏移量,这个要结合具体App来实践。
暂停 方法:Wait()
暂停脚本的执行,单位为毫秒。
释放 方法release() 结束的行动取消屏幕上的指针。
执行 perform() 执行的操作发送到服务器的命令操作。
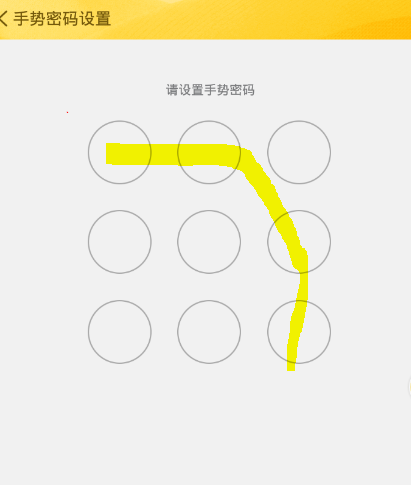
TouchAction实战——九宫格滑动操作 九宫格是一种比较常见的图案加密方式,目前很多App都支持设置图案锁,Android原生系统也支持设九宫格图案锁屏。那么我们该如何使用Appium进行滑动操作呢?
测试场景 安装启动随手记App
测试环境
夜神模拟器 Android 5.1.1
随手记Android版 V10.5.6.0
Win 10 64bit
Appium 1.7.2
代码实现 touch_action.py
1 2 3 4 5 6 7 8 9 10 11 12 13 14 15 16 17 18 19 20 21 22 23 24 25 26 27 28 29 30 31 32 33 34 35 36 37 38 39 40 41 42 43 44 45 46 47 48 49 50 51 52 53 54 55 56 57 58 59 60 61 62 63 64 65 66 67 68 69 70 71 72 73 74 75 76 77 from appium import webdriverfrom time import sleepfrom appium.webdriver.common.touch_action import TouchActionfrom selenium.webdriver.support.ui import WebDriverWaitfrom selenium.common.exceptions import NoSuchElementExceptiondesired_caps={} desired_caps['platformName' ]='Android' desired_caps['platformVersion' ]='5.1.1' desired_caps['deviceName' ]='127.0.0.1:62025' desired_caps['app' ]=r'C:\Users\Shuqing\Desktop\mymoney.apk' desired_caps['appPackage' ]='com.mymoney' desired_caps['appActivity' ]='com.mymoney.biz.splash.SplashScreenActivity' driver = webdriver.Remote('http://localhost:4723/wd/hub' , desired_caps) driver.implicitly_wait(5 ) def get_size (): x=driver.get_window_size()['width' ] y=driver.get_window_size()['height' ] return x,y def swipeLeft (): l=get_size() x1=int (l[0 ]*0.9 ) y1=int (l[1 ]*0.5 ) x2=int (l[0 ]*0.1 ) driver.swipe(x1,y1,x2,y1,1000 ) def swipeUp (): l = get_size() x1 = int (l[0 ] * 0.5 ) y1 = int (l[1 ] * 0.95 ) y2 = int (l[1 ] * 0.35 ) driver.swipe(x1, y1, x1, y2, 1000 ) WebDriverWait(driver,6 ).until(lambda x:x.find_element_by_id("com.mymoney:id/next_btn" )) for i in range (2 ): swipeLeft() sleep(1 ) driver.find_element_by_id('com.mymoney:id/begin_btn' ).click() try : closBtn=driver.find_element_by_id('com.mymoney:id/close_iv' ) except NoSuchElementException: pass else : closBtn.click() driver.find_element_by_id('com.mymoney:id/nav_setting_btn' ).click() WebDriverWait(driver,6 ).until(lambda x:x.find_element_by_id("com.mymoney:id/content_container_ly" )) swipeUp() driver.find_element_by_android_uiautomator('new UiSelector().text("高级")' ).click() driver.find_element_by_id('com.mymoney:id/password_protected_briv' ).click() driver.find_element_by_id('com.mymoney:id/lock_pattern_or_not_sriv' ).click() for i in range (2 ): TouchAction(driver).press(x=243 ,y=381 ).wait(2000 )\ .move_to(x=455 ,y=390 ).wait(1000 )\ .move_to(x=643 ,y=584 ).wait(1000 )\ .move_to(x=647 ,y=784 ).wait(1000 )\ .release().perform()
效果演示
参考资料 http://appium.io/docs/cn/writing-running-appium/touch-actions/
https://stackoverflow.com/questions/38565116/zoom-action-in-android-using-appium-python-client